


Introducing the Safe-T-L-Stopper®
from Mazco Products and Services
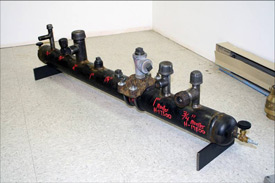
The Mazco Safe-T-L-Stopper® is designed to remove elbow swing joint service connections from threaded couplings welded onto the main line, as well as service connections threaded directly into the main pipeline wall.
Operating instructions
Using Safe-T-L-Stopper to remove Elbow Swing Joint Service Connections
The Safe-T-L-Stopper is designed to remove elbow swing joint service connections from threaded couplings, as well as service connections threaded directly in the main line.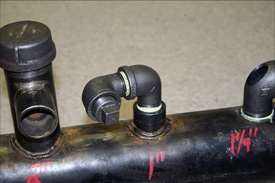
The following information will identify the steps necessary to safely drill and stop a street elbow swing joint service connection in a gas free environment.
1. Remove protective coating, dirt and scale from street elbow or standard elbow swing joint connection.
2. Slip proper-sized elbow seal over the elbow.
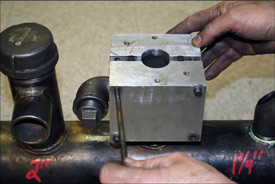
3. Mount the two halves of the elbow housing over the elbow seal.
4. Install the four bolts into the two halves of the elbow housing and tighten.
5. Mount the valve adapter to the elbow housing and secure with the two cap screws.
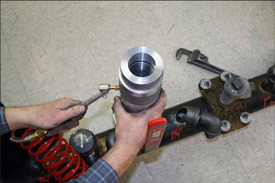
6. Install the isolation valve to the valve adapter.
7. Install the upper housing extension to the valve.
8. Install view port, check alignment and apply air pressure through the pressure tap to test the entire assembly for proper sealing before drilling. Open the bleeder valve and release the pressure. Remove the view port. Close the bleeder valve.
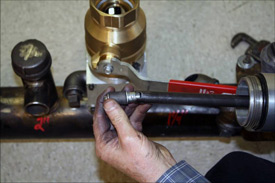
9. Select the appropriately sized drill bit adapter and mount the drill bit housing onto the upper housing extension.
10. Lower the drill bit through the isolation valve and engage the drill bit with the upper radius of the elbow.
11. Continuously drill into the inner surface of the elbow.
12. Extend the drill operation into the throat of the elbow, as necessary, or into the main line if a uniform hole in the main is desired.
13. Once the hole has been drilled in the elbow or main, continue the drill rotation and raise the drill bit above the isolation valve and into the drill shaft housing.
14. Close the isolation valve.
15. Open the bleeder valve.
16. Remove the upper extension housing and drill shaft housing.
17. Mount the magnet to the expander plug tool and mount to the isolation valve.

18. Close the bleeder valve and open the isolation valve.
19. Lower the magnet to pick up the metal filings. Repeat if necessary.
20. Raise the expander tool shaft into the housing.
21. Close the isolation valve and open the bleeder valve.
22. Remove the expander tool, shaft and magnet.
23. Place the appropriately sized expander plug into the expander tool shaft.
24. This demonstration uses an expandable rubber-type plug, however Safe-T-L-Stopper can also be used to install a tapered threaded boiler-type plug.
25. Place the expander tool shaft alongside the isolation valve and set the depth guide marker to the desired plug setting depth.
26. Mount the expandable plug and tool shaft housing onto the isolation valve.
27. Close the bleeder valve.
28. Open the isolation valve.
29. Lower the expander plug to the desired depth location.
30. Set the expandable plug to seal off the flow through the elbow.
31. Release the gas from the service line pipe at a safe location.
32. Open the bleeder valve on the tool to confirm a complete depressurization.
33. Remove the tool from the service connection.
34. With the expander plug installed and set below the elbow in the coupling, cut the service piping and remove the threaded elbow from the coupling.
35. Place a threaded plug into the coupling and tighten.
The Safe-T-Stopper product line is also capable of stopping and removing swing joint elbow connections threaded directly into cast iron or steel mains.
Contact your Safe-T-Stopper supplier to order the Safe-T-L-Stopper tool